 "BiTurbo228 - Dr Frankenstein of Spitfires" (biturbo228)
01/10/2020 at 13:54 • Filed to: Spit6
 11
11
 9
9|
"BiTurbo228 - Dr Frankenstein of Spitfires" (biturbo228)
01/10/2020 at 13:54 • Filed to: Spit6 | 11
| 9 |
Hey folks, long time no speak! Been loitering around here less and less since work barred kinja websites so I can’t peruse at lunch, but thought I’d keep in touch with what’s been happening. Onto the Spitfire now :)
!!! UNSUPPORTED LINE BREAK IN HEADER !!!
So, we last left the Spitfire having decided that !!!error: Indecipherable SUB-paragraph formatting!!! . 8 months of progressive sanding and painting attempts still left me with runs and various other problems so I decided to sack it in until I can get a better paint booth set up. Just as well as I’ve done loads of welding to the body since, and it’s allowed me to not compromise on fitment of various bits.
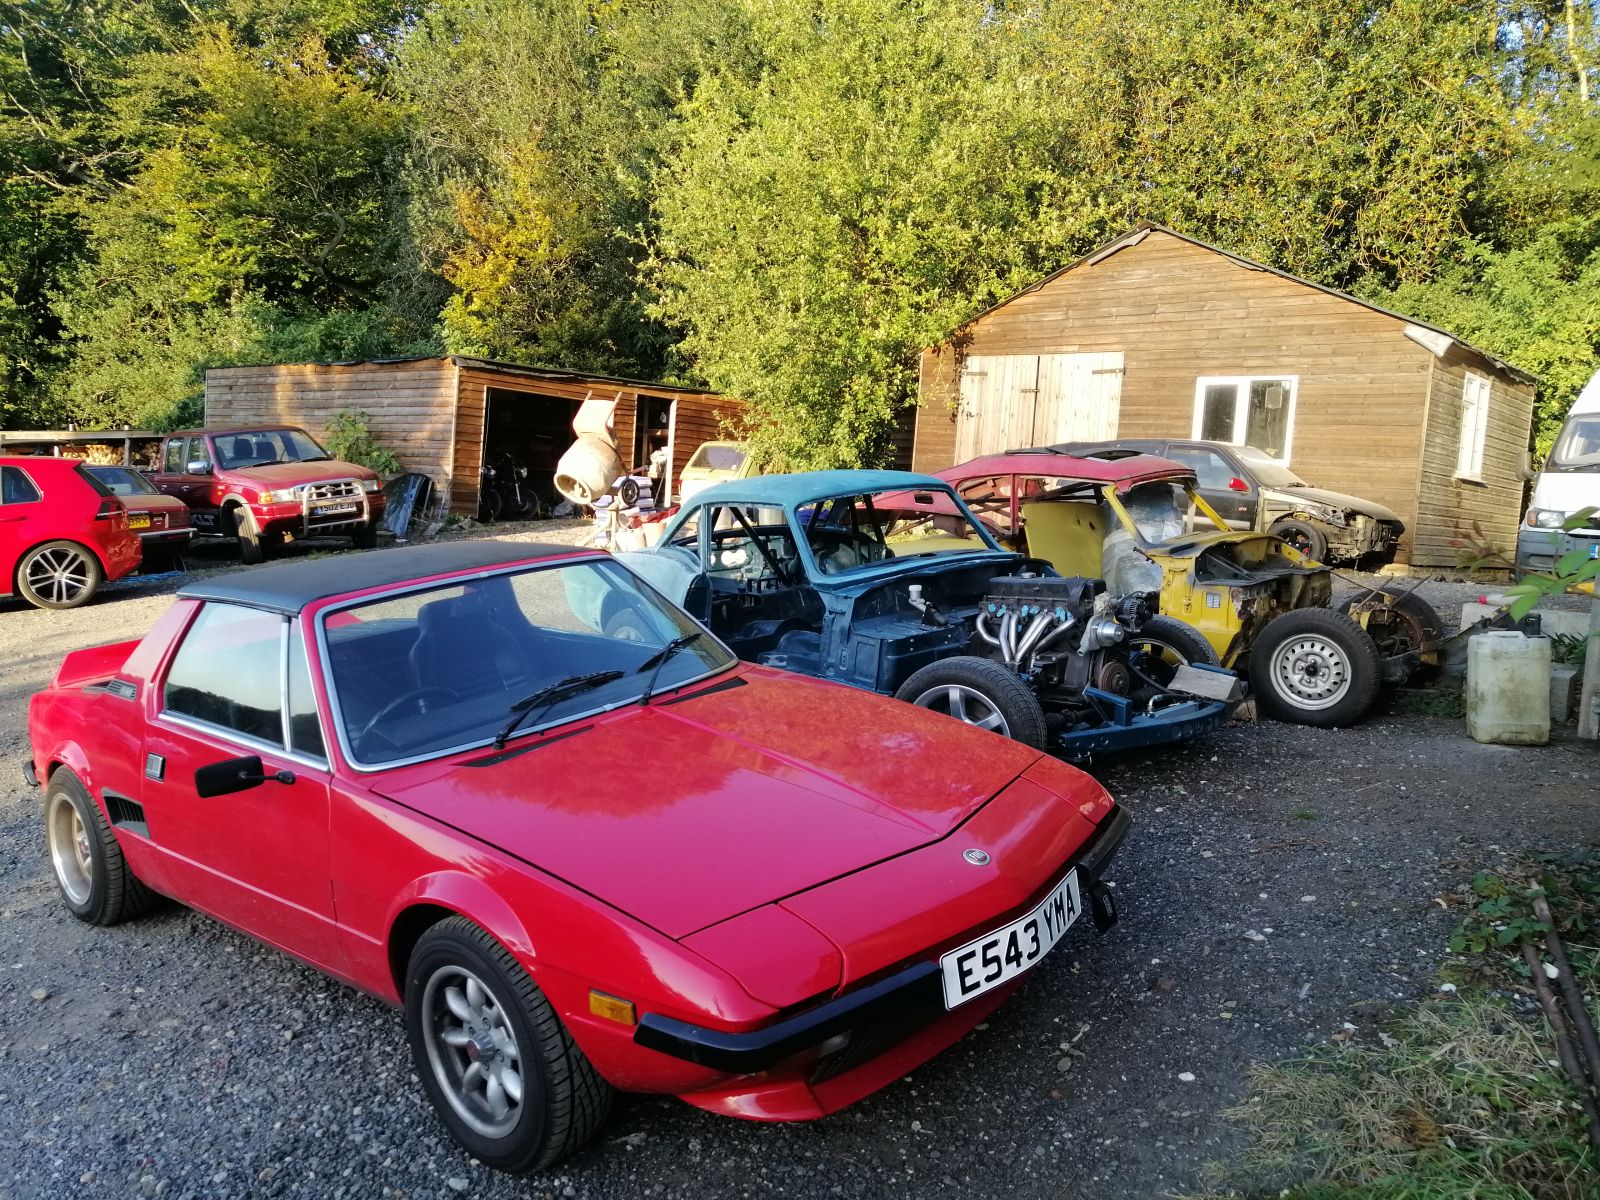
Wheeled the Spit out of my dad’s garage and back to mine :)

First order of business is relocating the fuel tank. Before reading up on the registration requirements for radically modified vehicles here (the IVA) I’d plumped for a GT6 fuel tank in the boot and used the space where the old tank was for better rollbar locations, space for the battery and space for the fuel pumps and swirl pot. At the time, I didn’t think the IVA people would like the fuel tank being in a place with such little crash protection so it’s got to move (turns out they’re fine with it, so long as it’s not the first thing to get hit and there’s no obvious spikes poking towards it).
There are positives to this though. I get my boot space back. Although the weight distribution will be shifted forwards, it’ll help a lot with polar moment of inertia. Oh, and less chance of a fiery death of course...
I thought about putting the battery and fuel pumps in the boot, but the crash protection and polar moment of inertia arguments came up again so they’re going on the parcel shelf behind the seats.
Started with simply plonking it on top of the parcel shelf and welding in some thick tabs to retain it.
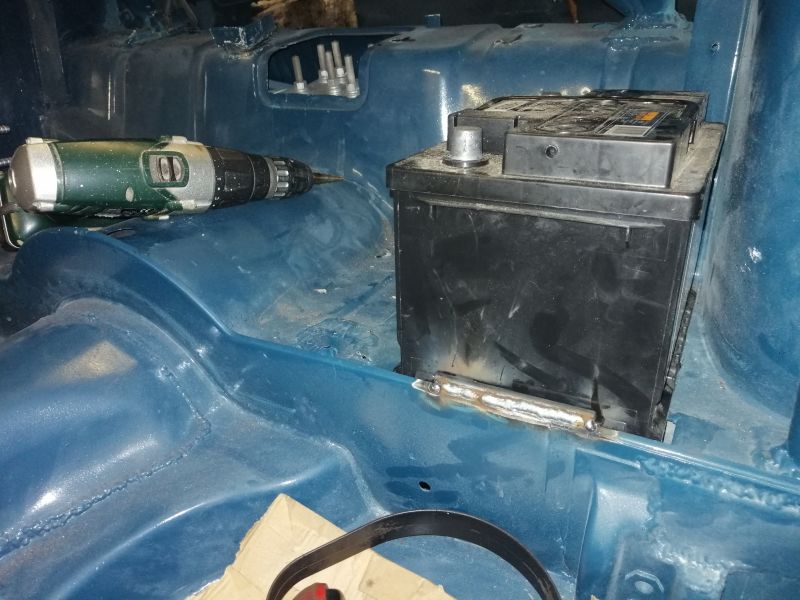
After someone very sensibly suggested I might want a bit of a stronger solution in case of accident/plastic of battery breaks/18kg battery hits my passenger in the head, I had a better go at it.
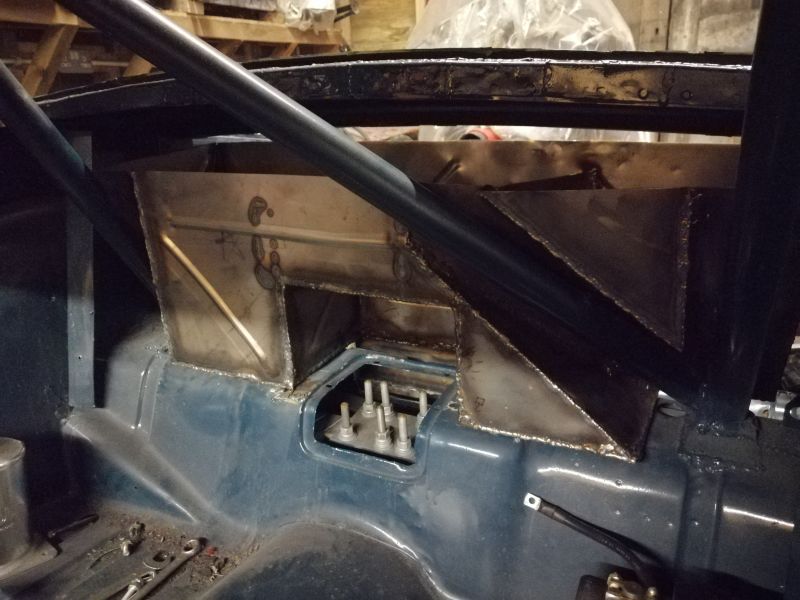
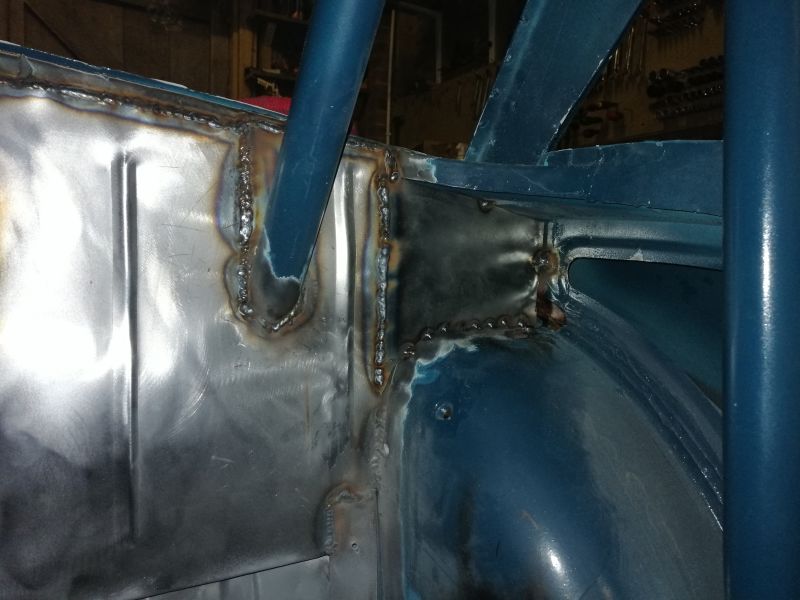
Recessed a little tub into the parcel shelf so it’s sitting a little lower (which also helped tie that part of the body tub into the chassis better). 2" lower will help with CoG height slightly too :)
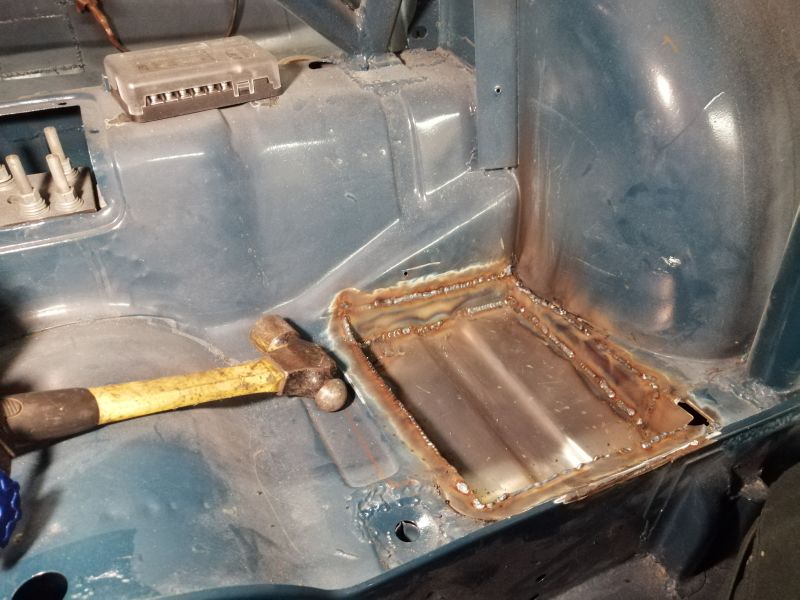
Also sorted a much beefier retaining bracket that goes over the top of the battery.
With that sorted I moved onto the swirl pot/fuel pump setup. That was originally going to live in the place the fuel tank would now be occupying, so had to find another place. Easiest would be plonking it in the boot, but I’d grown attached to my increased boot space and it struck me as a lazy solution.
Started looking for areas that might work for a fabricated swirl pot and came up with this underneath car on the opposite side of the body to the battery:
Sadly, I just couldn’t get a fuel pump and fuel filter to package nicely with the swirl pot in place. So, having re-watched the !!!error: Indecipherable SUB-paragraph formatting!!! of Project Binky, I thought ‘sod it, let’s make my own tank with an in-built sump’.
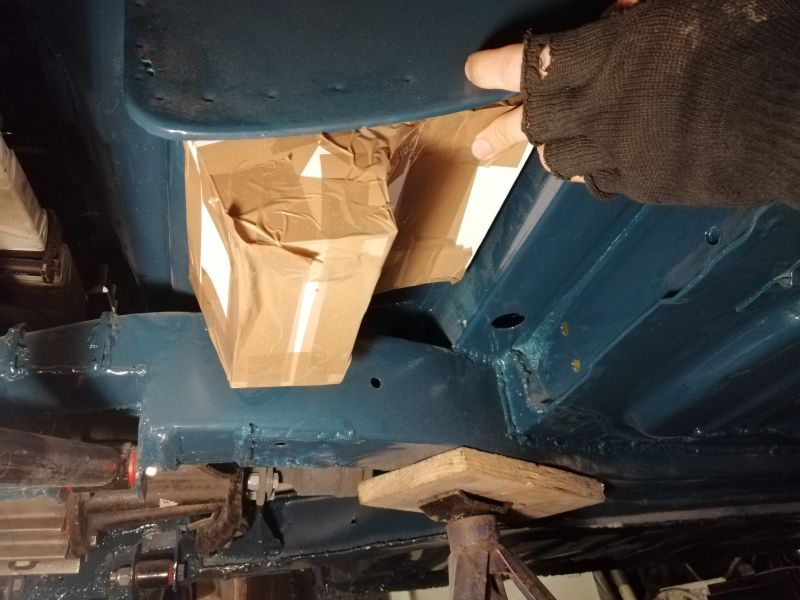
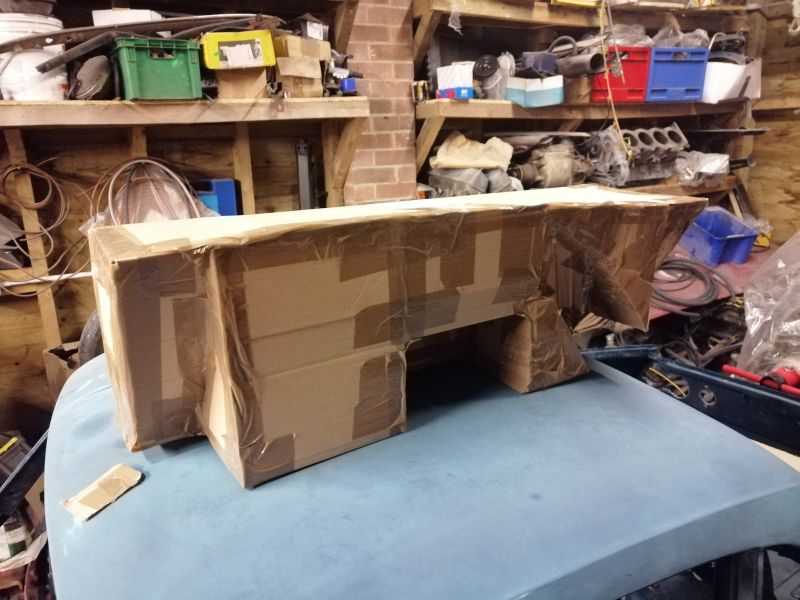
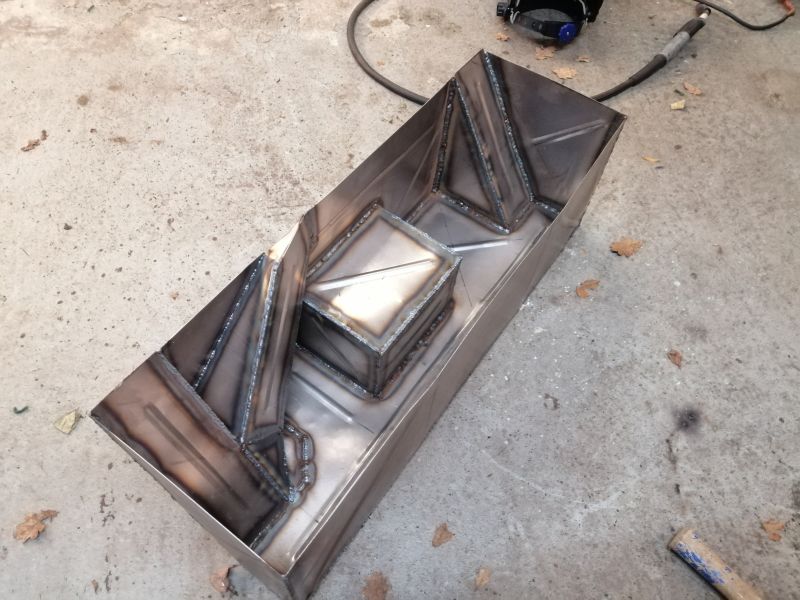
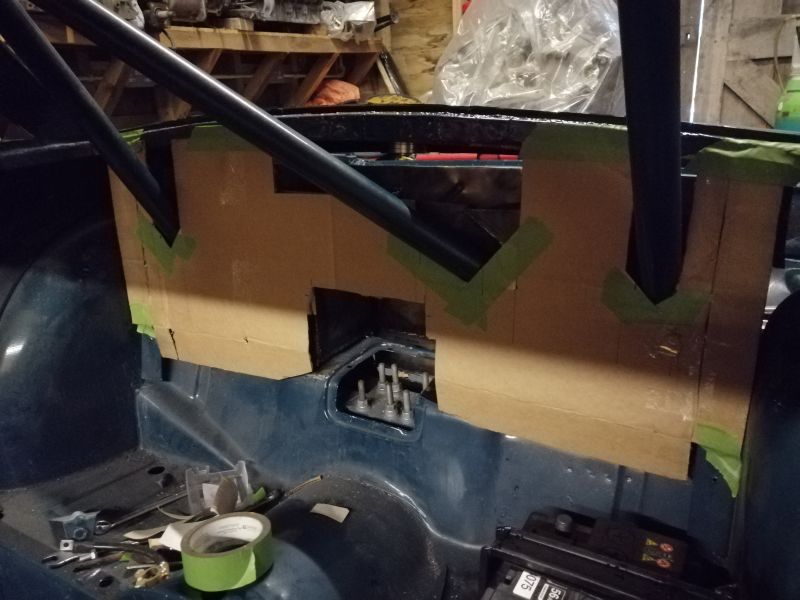
An arts and craft’s session resulted in this CAD template (Cardboard Aided Design):
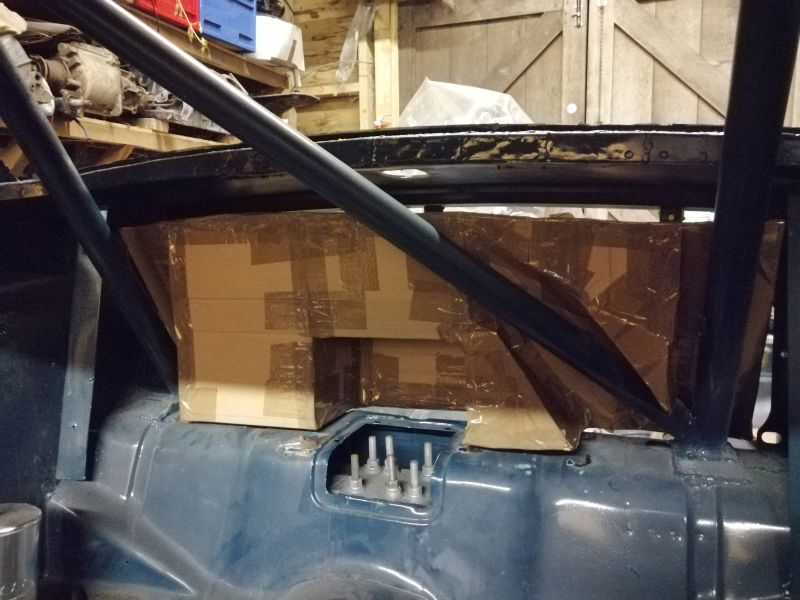
Which fit like so:
Through better use of the space available, I worked out that it should hold 40ish litres compared to the stock 33 litre tank, even though it has cutouts to clear the roll bar tubing.
Plumped for 0.9mm steel to save some weight over 1.5mm (sadly, can’t TIG yet so ally was out of the question). Bought an eBay bead roller as well to add some stiffness back in which worked beautifully. Quite quickly went from this...

...to this:
Took forever of filling it up with water, checking for leaks, draining and drying it, welding up the leaks, and checking again and again for more leaks before it was watertight. TIG would have been much easier as you can gloss the torch over after you’re done to melt everything together.
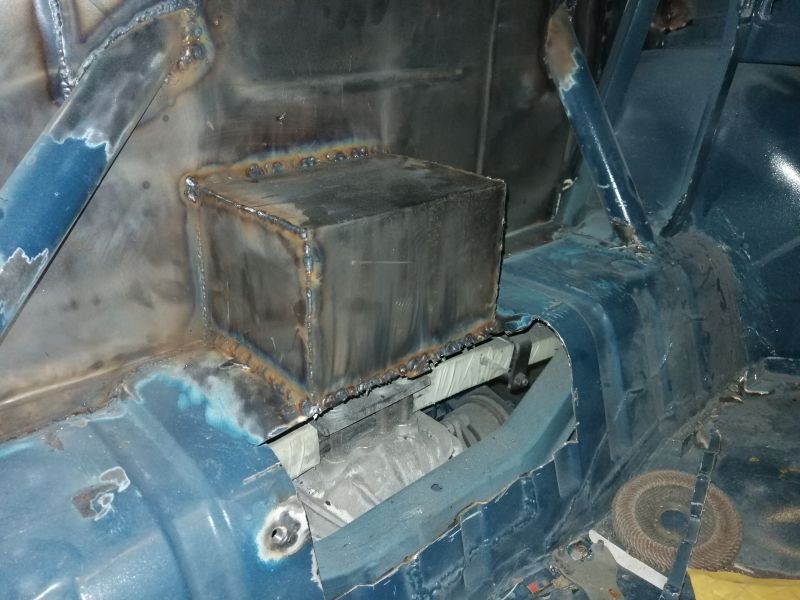
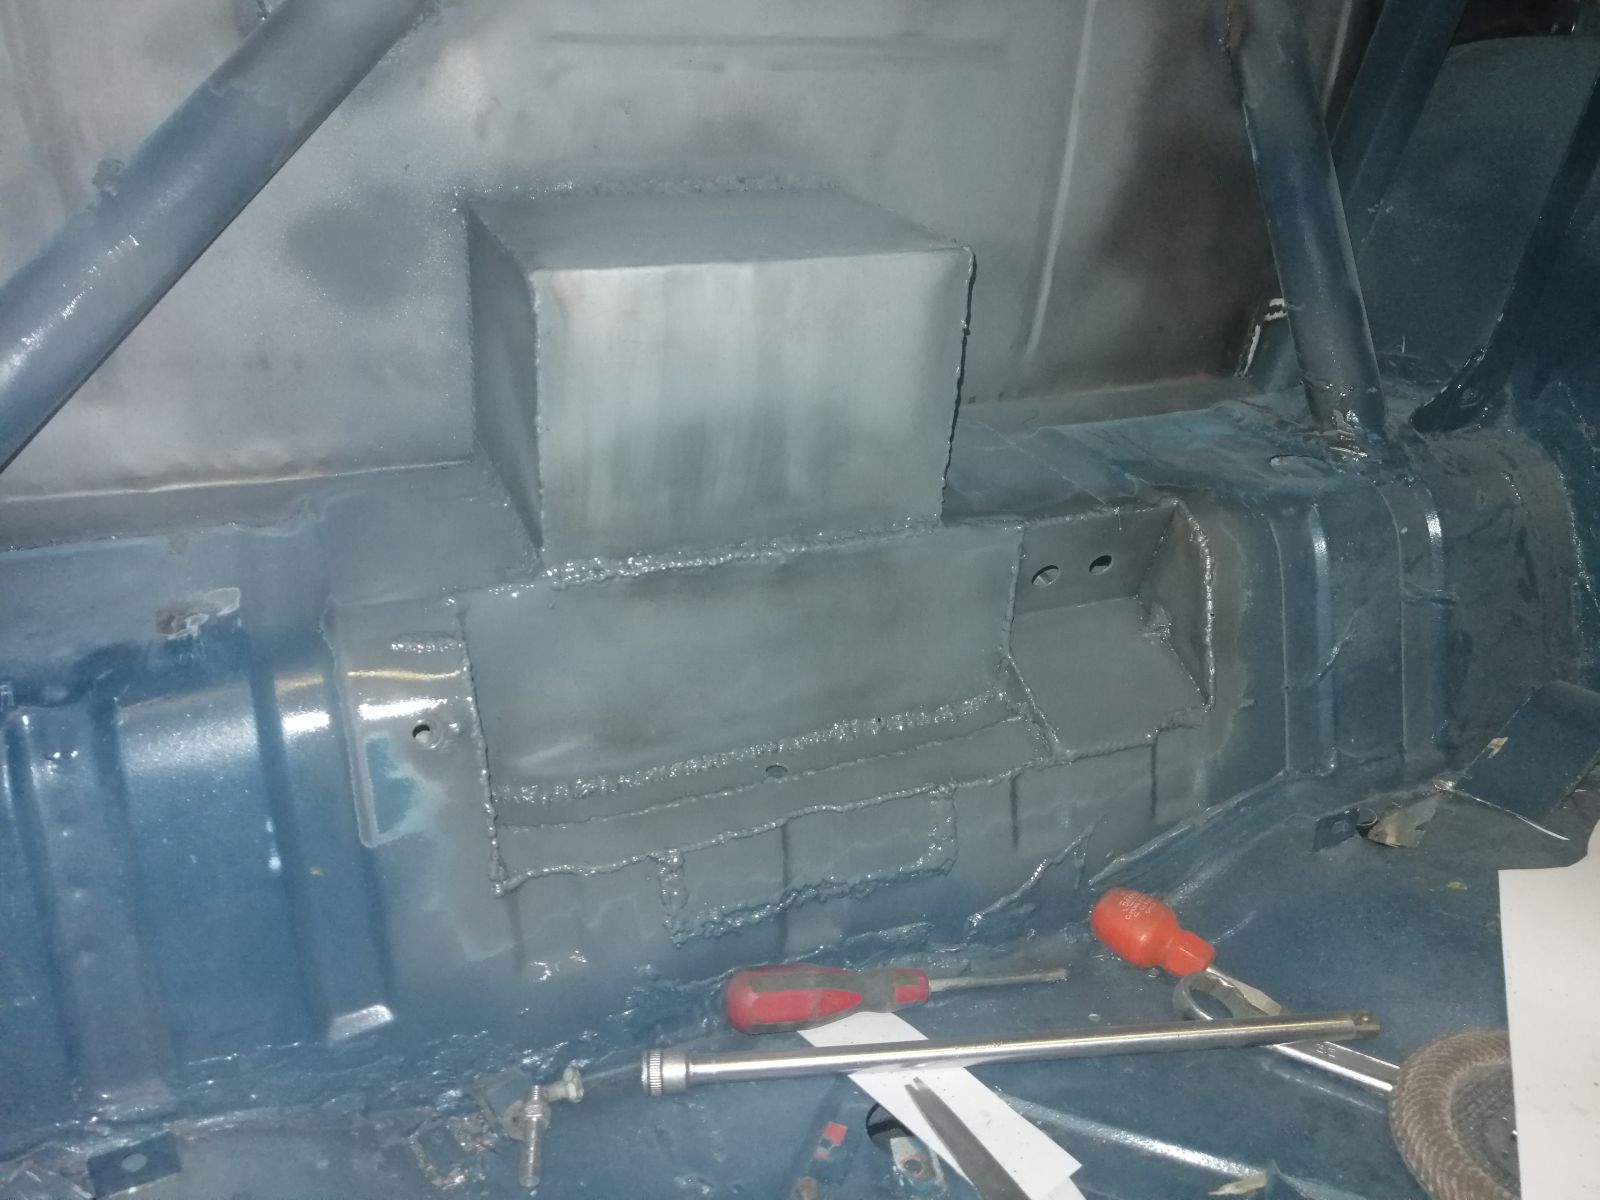
Next steps were some baffles and welding in a level sensor brackety bit from the stock fuel tank...
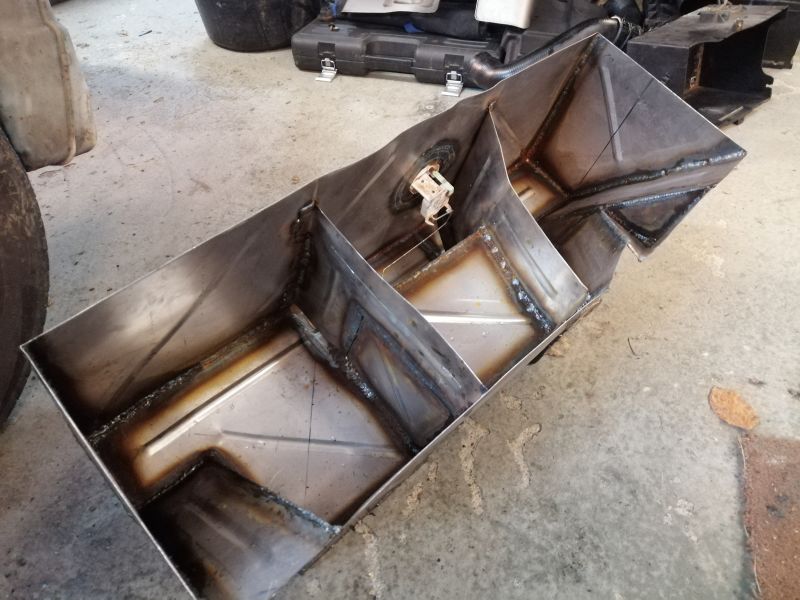
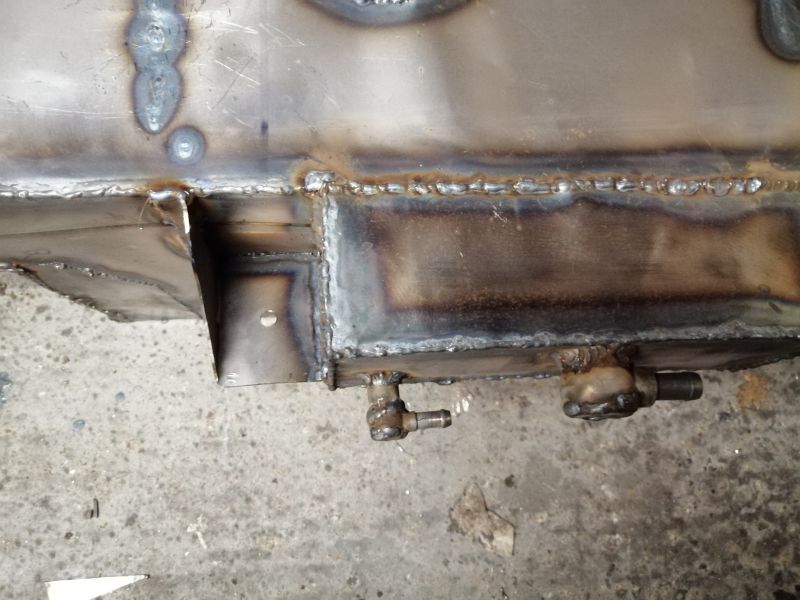
...and welding on a 2 litre sump to the bottom of the tank.
Hopefully the combination of sump and baffles will keep enough fuel by the pickup during sweeping corners that I won’t need to have an external swirl pot and lift pump (saving a bit of weight and electrical complication). Plumbing in the return feed from the fuel rail to the sump should help with that too.
Fits rather neatly I think :)
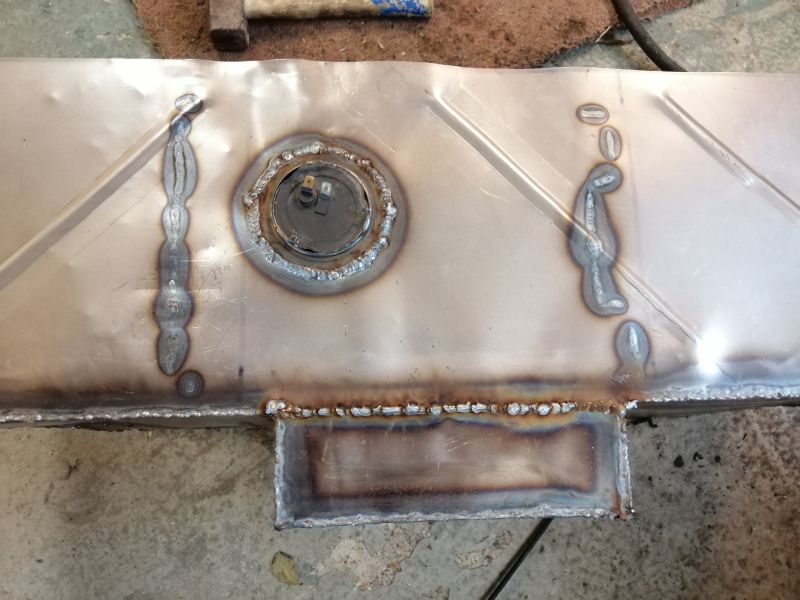
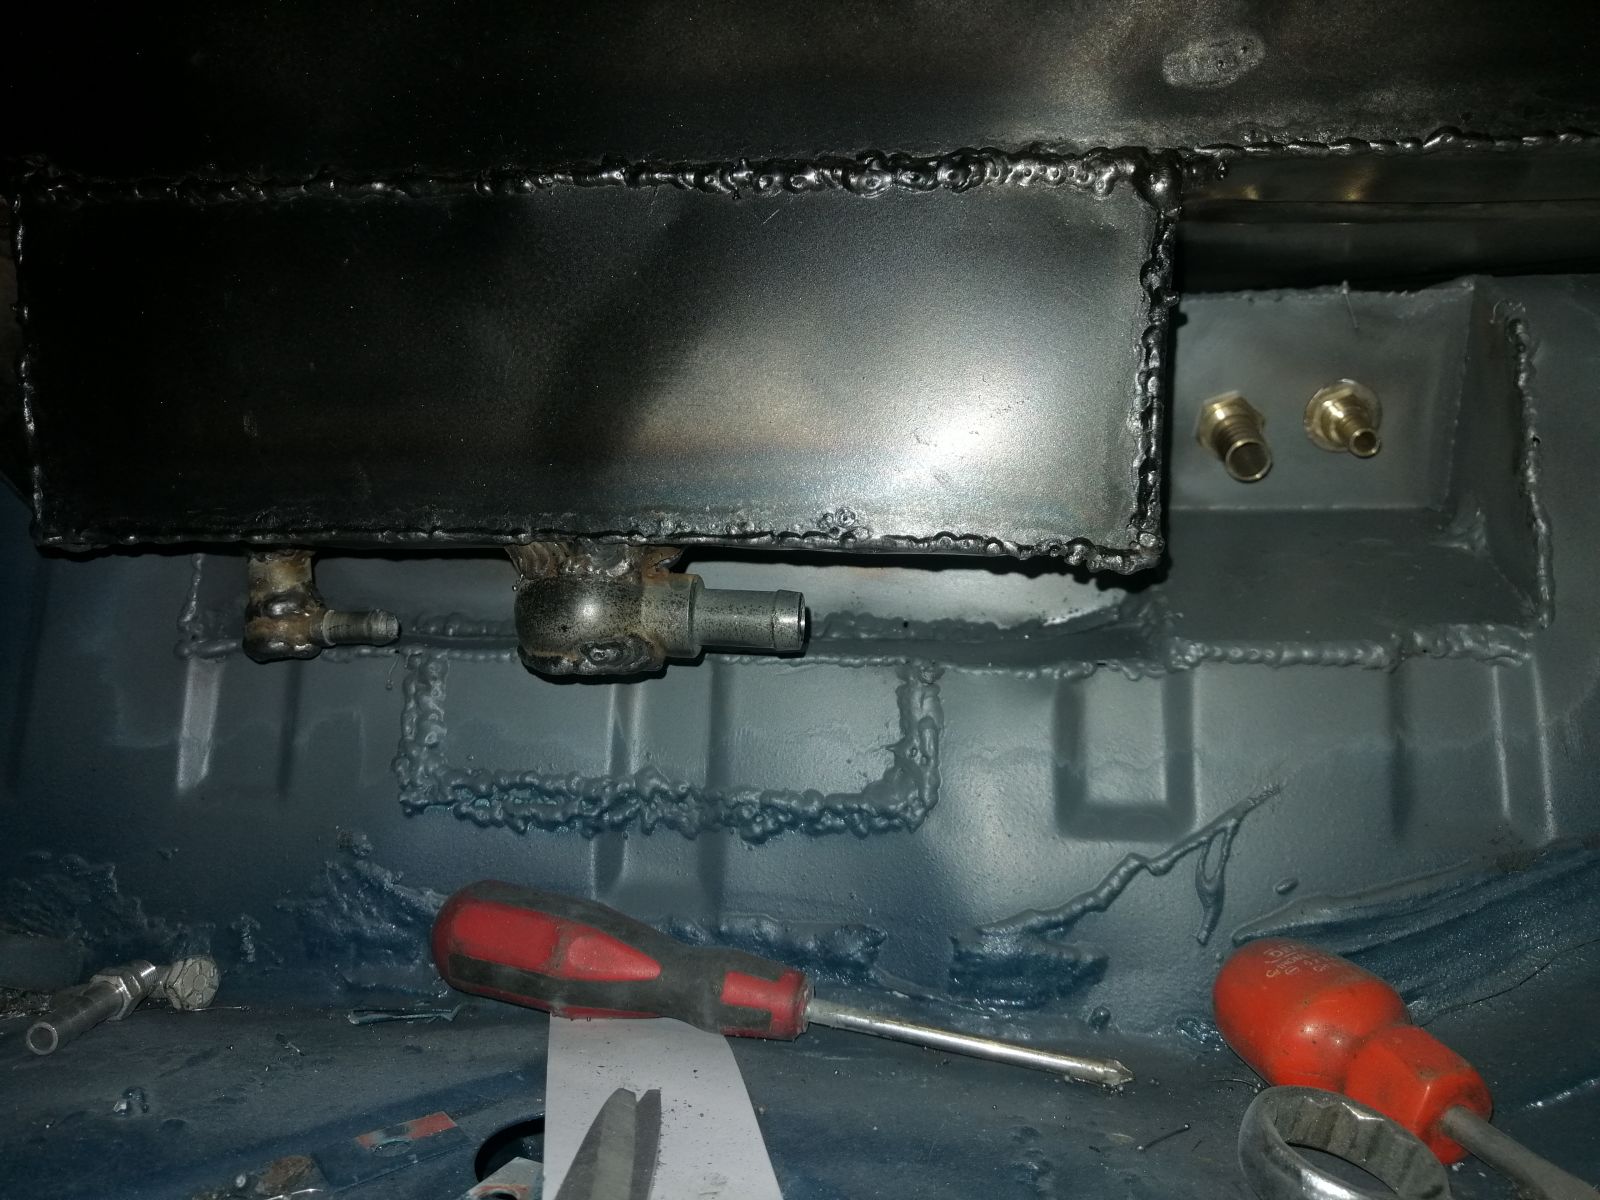
Next challenge was inlet and outlet locations. I’d planned on welding some barbed fittings directly out of the front of the sump, but turned out those would exit directly into the spring. Plus, the front of the sump isn’t the best place to have your fuel pickup as the fuel tends to be at the back when you’re accelerating and using the most fuel.
Decided to weld some banjo fittings directly to the bottom of the sump (could have welded some bungs to thread them in, but figured that would be one more place for leaks). Also sorted some mounting brackets.
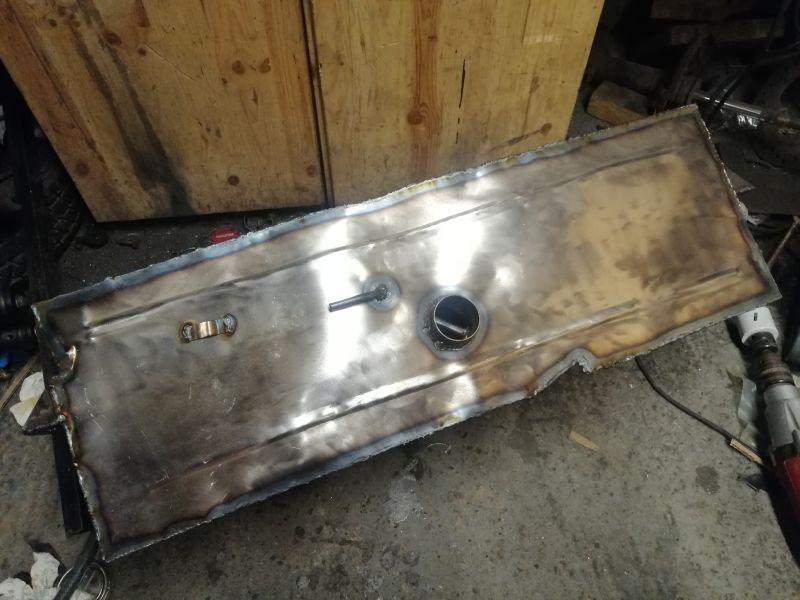
Made up a top panel for it with a filler neck and tube for venting. The little bar in the neck is so the pump nozzle sits in the right place without having to hold it up :) bit of fuel tank paint on the inside and that was the tank done!
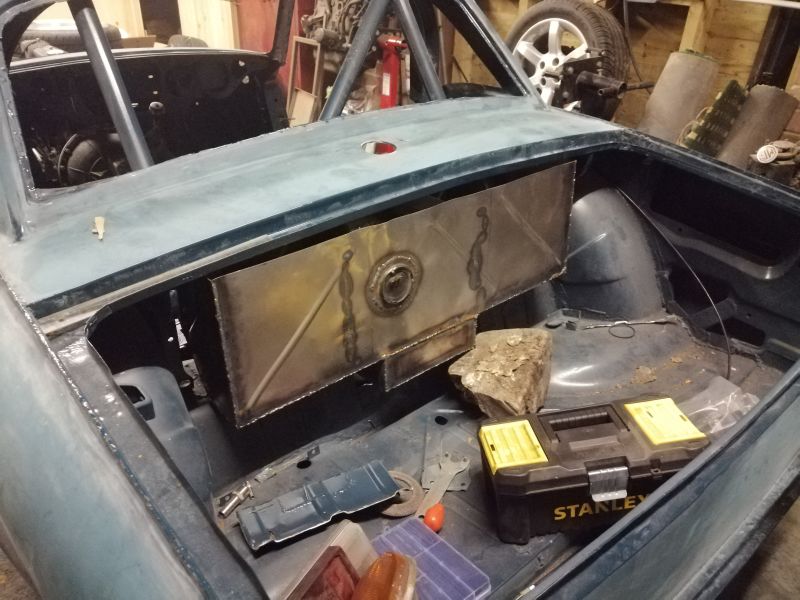
Reading some more of the regulations, the IVA people do not want the fuel tank to be in the passenger compartment, or in a compartment integral with it. The stock Spitfire had an MDF board separating the two which might have been alright back in 1973 with a backhander to the inspection officer, but I figured a better solution would be required.
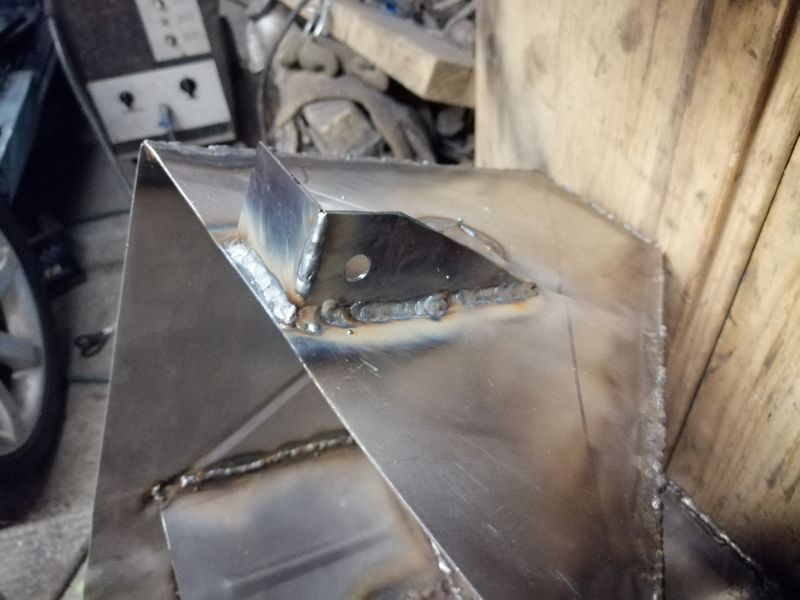
Thought about making a bolt-in panel, but getting it sealed would be a pain so plumped for a welded bulkhead (in leftover 0.9mm steel from the tank to save weight as that area’s already plenty stiff enough).
Quick CAD template...
...made up in steel...
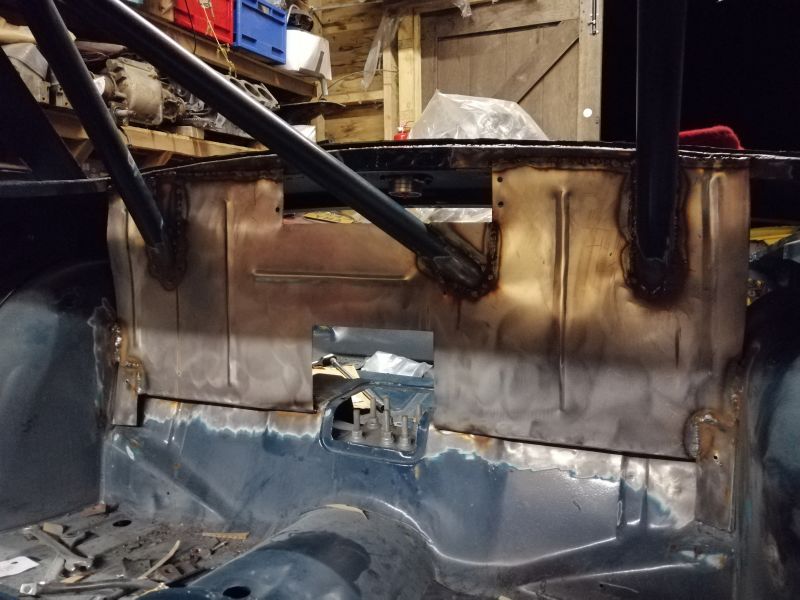
...gaps above the roll hoop welded up...
...and the area above the spring mount boxed in for access without removing the fuel tank...
...and lastly the areas above the arches boxed in.
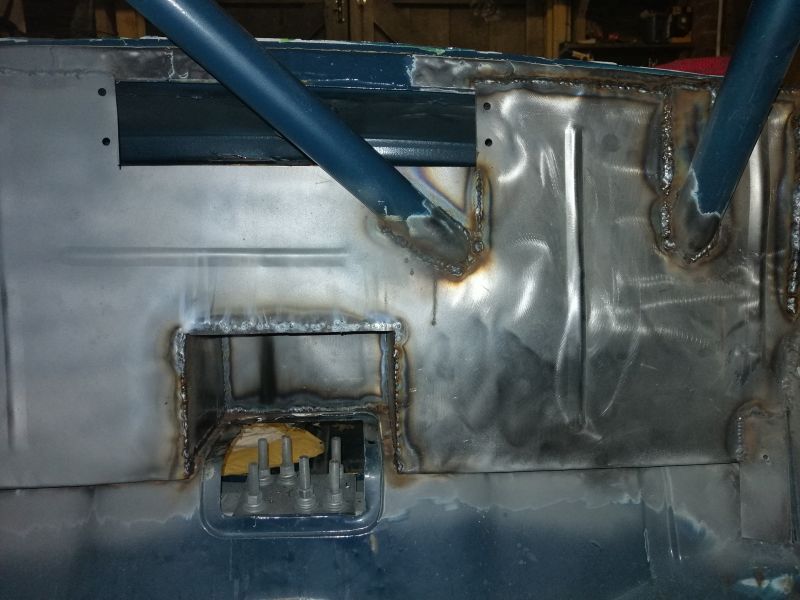
Last little job was boxing in the hole cut in the axle tunnel to clear the sump, and poking some holes through it to fit bulkhead fittings.
The plan is to run short sections of hose from the tank to the bulkhead fittings for easy removal, and then more pipes running over the top of the spring and down to the filter and pump under the car. Once those pipes are in then that’s the last piece of fuel tank work left inside the car!
That’s progress on the Spitfire to date :) next steps are to mount the fuel pump and filters where the old swirl pot was going to live, and start on the rear wiring loom.
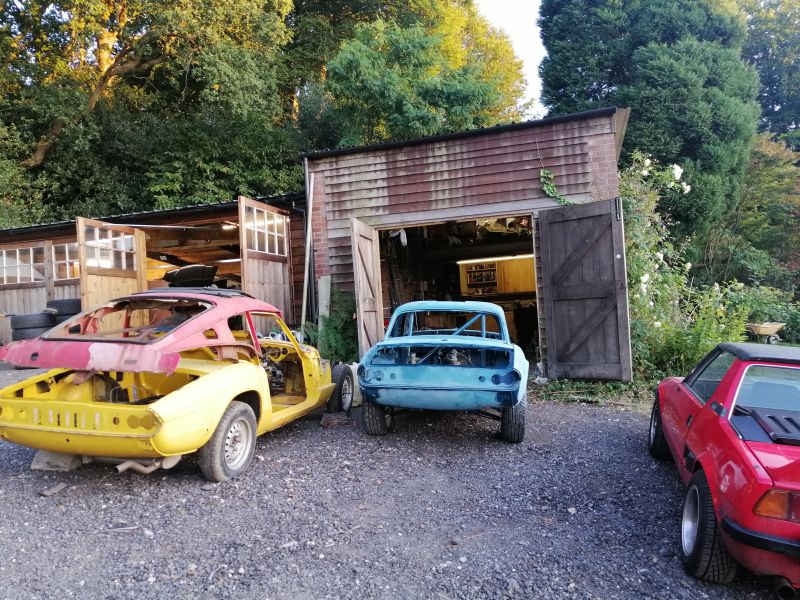
But that’s not all I’ve been up to! One more post incoming with the rest of the fleet ;)
 RamblinRover Luxury-Yacht
> BiTurbo228 - Dr Frankenstein of Spitfires
RamblinRover Luxury-Yacht
> BiTurbo228 - Dr Frankenstein of Spitfires
01/10/2020 at 14:08 |
|
Wish I’d been able to help you with the tank. It’s very nearly my job - not the welding, but the design. One of the things I do is draw up fab drawings for stainless pieces to go together and make watertight chambers (process chambers for humidification conditioners).
The lads here TIG everything together, as you’d assume. We then have an acid tank to remove weld funk and passivate so the parts don’t exhibit un-stainless-ness.
Interesting that the IVA requirements would bollux anything built out of a W123 Benz, as I don’t believe the behind-seat tank there is properly isolated.
On an unrelated note, that welding’s gotten a bit prettier, but I still think you might want an update from the old Italian monster at some point.
 CalzoneGolem
> BiTurbo228 - Dr Frankenstein of Spitfires
CalzoneGolem
> BiTurbo228 - Dr Frankenstein of Spitfires
01/10/2020 at 14:16 |
|

|
BiTurbo228 - Dr Frankenstein of Spitfires
> CalzoneGolem
01/10/2020 at 16:03 |
|
Haha that is a nice boulder ;)
|
CalzoneGolem
> BiTurbo228 - Dr Frankenstein of Spitfires
01/10/2020 at 16:06 |
|
Good to have you and the spit back
|
BiTurbo228 - Dr Frankenstein of Spitfires
> RamblinRover Luxury-Yacht
01/10/2020 at 16:10 |
|
Damn, that would have been very helpful! Anything you can see I’ve done wrong ;)
Would love an acid dip thing to get the weld gunk out of the deep corners. Relied on too much wire wheeling and phosphoric acid spray.
Yeah I do wonder how strict they are on the fuel bulkhead. A lot of older cars seem to have MDF panels isolating the fuel tank. Tbh, if you've done enough to your car to require this test I'm sure welding in a bulkhead is well within your capabilities ;)
|
BiTurbo228 - Dr Frankenstein of Spitfires
> CalzoneGolem
01/10/2020 at 16:10 |
|
Good to be back ;) still not running of course, but inching closer ;)
|
CalzoneGolem
> BiTurbo228 - Dr Frankenstein of Spitfires
01/10/2020 at 16:14 |
|
Yeah big mood
|
RamblinRover Luxury-Yacht
> BiTurbo228 - Dr Frankenstein of Spitfires
01/10/2020 at 17:06 |
|
I’d have been tempted to use an oxy torch over any of the dodgier seams, but one way or another, you’ve got it tight. I think possibly the thing to do now might be tank sealant, since while it’s fuel-tight, it might still have some chemically “funny” spots to try and serve as nucleation for rust, and rather than relying just on phosphoric spray, the stuff they have as prep for tank dip ought to be nearly as good as an acid dip even before the polymer goes in.
You’ve happened on one of the chief considerations (design-wise) for a fabricated/not-drawn tank
nearly incidentally - that is, to not have any overlaps where the metal meets and to only have edge to edge welds. By far the easiest to make sure it’ll seal where welded
unless you were to plan on leading the tank, which... I think not.
|
BiTurbo228 - Dr Frankenstein of Spitfires
> RamblinRover Luxury-Yacht
01/10/2020 at 18:02 |
|
Now an oxy torch would have been smart ;)
I’ve filled it with some POR-15 fuel tank repair paint which is supposed to seal up pinholes, but we’ll see how well it does. Plan is to steal some PRC fuel tank sealant from my aircraft mate if there’s any leaks and seal it from the outside before the final coat of paint goes on.
Huh, funny I thought I was making a design faux pas by not using overlapping joints (but it made panel fabrication much easier). Glad t o know I stumbled upon the right solution ;)